How to Use a Foam Roller for Recovery
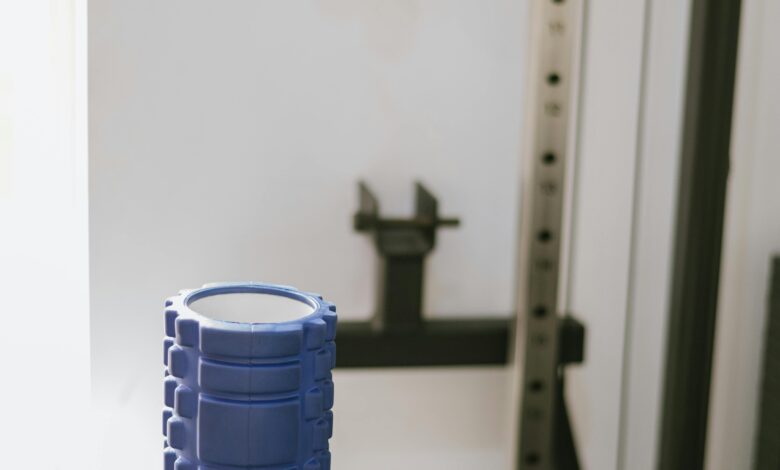
Foam rolling has become a popular tool in the fitness and recovery world, thanks to its ability to relieve muscle tension, improve flexibility, and enhance overall recovery. Whether you’re an athlete, a gym-goer, or someone who spends long hours sitting at a desk, foam rolling can help reduce soreness, prevent injuries, and promote better movement patterns.
In this article, we’ll explore what foam rolling is, how it works, and provide a step-by-step guide on how to use a foam roller effectively for recovery.
What Is Foam Rolling?
Foam rolling is a form of self-myofascial release (SMR) —a technique used to release tension in muscles and fascia (the connective tissue surrounding muscles). By applying pressure to specific areas of your body using a foam roller, you can break up knots, improve blood flow, and alleviate tightness.
Benefits of Foam Rolling
- Reduces Muscle Soreness : Helps alleviate delayed onset muscle soreness (DOMS) after intense workouts.
- Improves Flexibility and Range of Motion : Enhances mobility by loosening tight muscles and fascia.
- Enhances Recovery : Promotes faster recovery by increasing circulation and reducing inflammation.
- Prevents Injuries : Identifies and addresses areas of tension before they lead to imbalances or injuries.
- Relieves Stress : The act of foam rolling can be calming and meditative, helping to reduce stress and tension.
How Does Foam Rolling Work?
Foam rolling works by applying targeted pressure to trigger points (tight spots or knots) in your muscles. This pressure stimulates sensory receptors in your muscles and fascia, signaling your nervous system to relax the affected area. Over time, consistent foam rolling can:
- Break down adhesions in the fascia.
- Improve muscle elasticity.
- Restore proper alignment and function.
Step-by-Step Guide to Using a Foam Roller
1. Choose the Right Foam Roller
- Soft Rollers : Ideal for beginners or those with sensitive muscles.
- Firm Rollers : Better for deeper pressure and experienced users.
- Textured Rollers : Provide extra grip and intensity for targeting stubborn knots.
- Vibrating Rollers : Add vibration for enhanced relaxation and deeper penetration.
2. Warm Up First
- Before foam rolling, perform light cardio (e.g., walking, jogging, or dynamic stretches) to increase blood flow and make your muscles more pliable.
3. Start Slow and Gentle
- Begin with light pressure and gradually increase as your muscles adapt.
- Avoid rolling directly over bones, joints, or injured areas.
4. Target Major Muscle Groups
Focus on large muscle groups that are prone to tightness. Below are some common areas and techniques:
Calves
- Sit on the floor with your legs extended and place the foam roller under your calves.
- Lift your hips off the ground and roll from just below the knee to above the ankle.
- For deeper pressure, cross one leg over the other.
Hamstrings
- Sit on the foam roller with it positioned under your thighs.
- Use your hands to support your weight and roll from the back of your knees to your glutes.
- Rotate your legs slightly inward or outward to target different parts of the hamstring.
Quadriceps
- Lie face down with the foam roller under your thighs.
- Use your forearms to support your upper body and roll from your hips to just above your knees.
- For added intensity, stack one leg on top of the other.
IT Band
- Lie on your side with the foam roller under your outer thigh.
- Roll from your hip to just above your knee.
- Be cautious, as the IT band can be sensitive; start with short sessions.
Glutes
- Sit on the foam roller with one foot crossed over the opposite knee.
- Shift your weight onto the glute of the crossed leg and roll in small circles.
Upper Back
- Lie on your back with the foam roller positioned under your shoulder blades.
- Support your head with your hands and roll from your mid-back to your shoulders.
- Avoid rolling your lower back or neck.
Lats
- Lie on your side with the foam roller under your armpit.
- Roll along the side of your torso, focusing on the latissimus dorsi muscle.
5. Pause on Tight Spots
- When you find a tender or tight area, pause and hold the pressure for 20-30 seconds.
- Breathe deeply to encourage relaxation and release tension.
6. Finish with Stretches
- After foam rolling, perform static stretches to further improve flexibility and lock in the benefits.
Tips for Effective Foam Rolling
- Use Proper Form
- Maintain good posture to avoid straining other parts of your body.
- Engage your core to stabilize your movements.
- Avoid Rolling Too Fast
- Slow, deliberate movements allow the foam roller to penetrate deeper into the muscle tissue.
- Don’t Overdo It
- Limit each session to 10-15 minutes per muscle group to prevent overworking the muscles.
- Be Consistent
- Foam rolling is most effective when done regularly, ideally 2-3 times per week.
- Listen to Your Body
- Some discomfort is normal, but sharp pain indicates you’re applying too much pressure or targeting an inappropriate area.
Common Mistakes to Avoid
- Rolling Directly Over Joints or Bones
- Focus on soft tissue areas like muscles and fascia.
- Ignoring Problem Areas
- Don’t skip tight or sore spots; addressing them is key to improving mobility.
- Using Poor Posture
- Slouching or improper alignment can strain other parts of your body.
- Overusing the Foam Roller
- Excessive rolling can irritate muscles and delay recovery.
Who Should Avoid Foam Rolling?
While foam rolling is generally safe, certain individuals should consult a healthcare professional before starting:
- People with acute injuries or fractures.
- Individuals with chronic pain conditions like fibromyalgia.
- Those with circulatory issues or varicose veins.
- Pregnant women (unless cleared by a doctor).